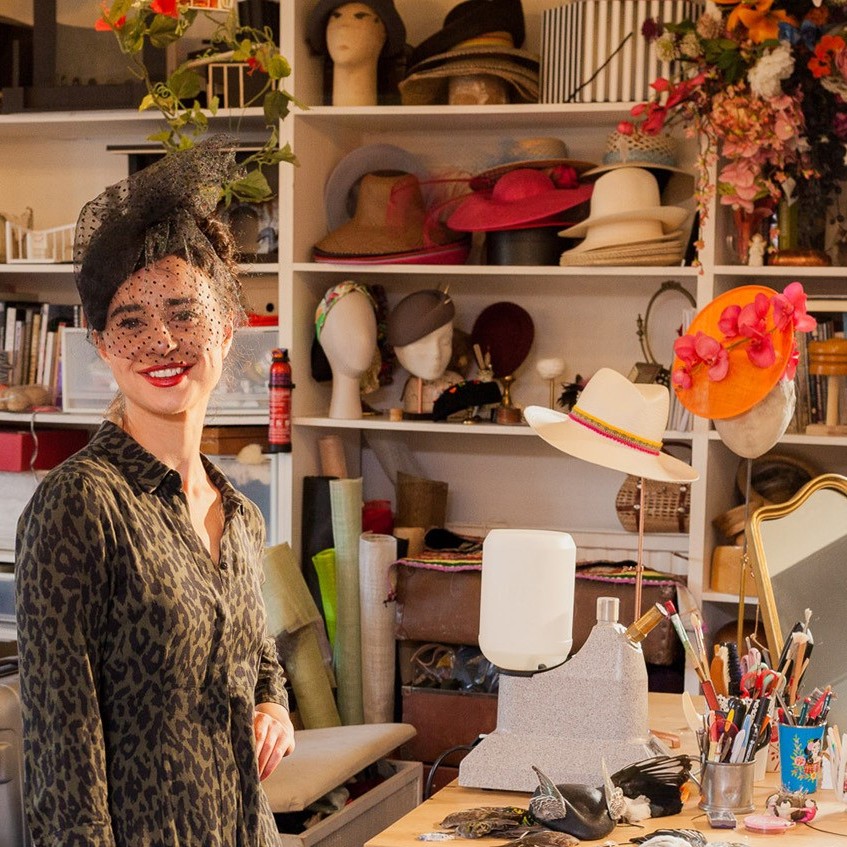
Helen Richman Textile Artist - Somerset, UK
You have an ancient craft that you give a modern take to doing bespoke pieces. Can you give some insight into a small but precious piece you have worked on recently?
I have recently finished writing a book on the embroidery technique known as Stumpwork. This is a technique which reached its height in popularity in the 17th century and was famous for its fun and vibrant colours, raised and three dimensional elements along with a jumble of charming motifs and designs. Today the technique remains incredibly popular and while I wanted to keep in mind the history and heritage of the technique, I also wanted to write a book which had a very contemporary feel. I was extremely fortunate to be able to study a number of historical examples and while doing so created my own illustrations and sketches which became a source of inspiration during the process of writing the book. Designing and stitching the ten small projects for readers to try at home was a joy and I really hope that I have continued the love of this technique by giving it my own interpretation. The book ‘Stumpwork Embroidery- Techniques and Projects’ will be published by The Crowood Press later this year.
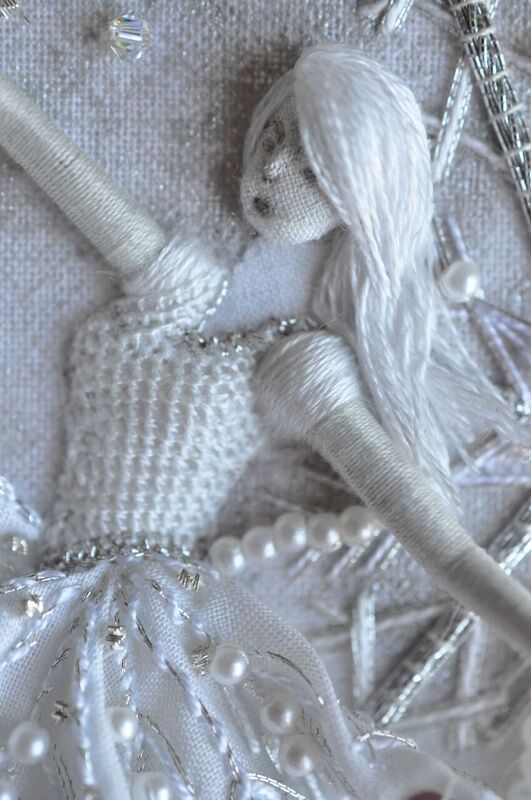
‘A Flourish of Frost’
Expand on your training as an embroiderer?
My love for art, textiles and embroidery started when I was very young, I would spend my summer holidays creating paintings, drawings, cushions and cross stitch kits. I chose to study Textiles and Art at GCSE level at school and continued Textiles, along with photography, at college up to A level. I then served a three year apprenticeship at the Royal School of Needlework which is based at Hampton Court Palace. There were six students in my year. During term times, we learnt a huge number of embroidery techniques and had to create a finished piece, each which we had to design, create and mount ready to be marked by our tutors at the end of term. Alongside this we created file work of our studies into the history of each technique and all of our technical notes and drawings. Between terms we worked alongside the staff in the school’s studio. We were shown and then practised various conservation techniques and helped with the creation of new commissions. We would occasionally assist the tutors with the running of weekend day classes which enabled us to gain valuable experience of teaching and passing on our knowledge to others.
Now that you are a teacher, what is one of your favourite classes and why?
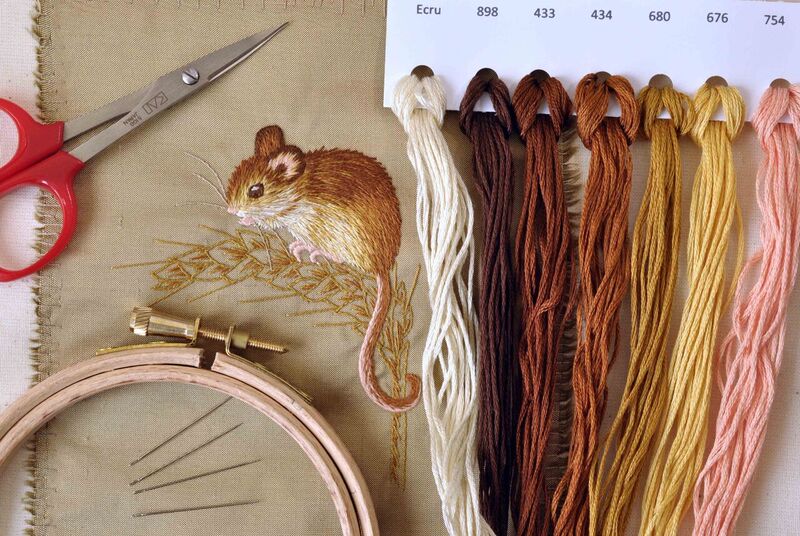
It is so hard to choose! I really enjoy teaching the finesse and intricacy of goldwork, silk shading and crewelwork but I particularly love teaching the introduction to embroidery classes.
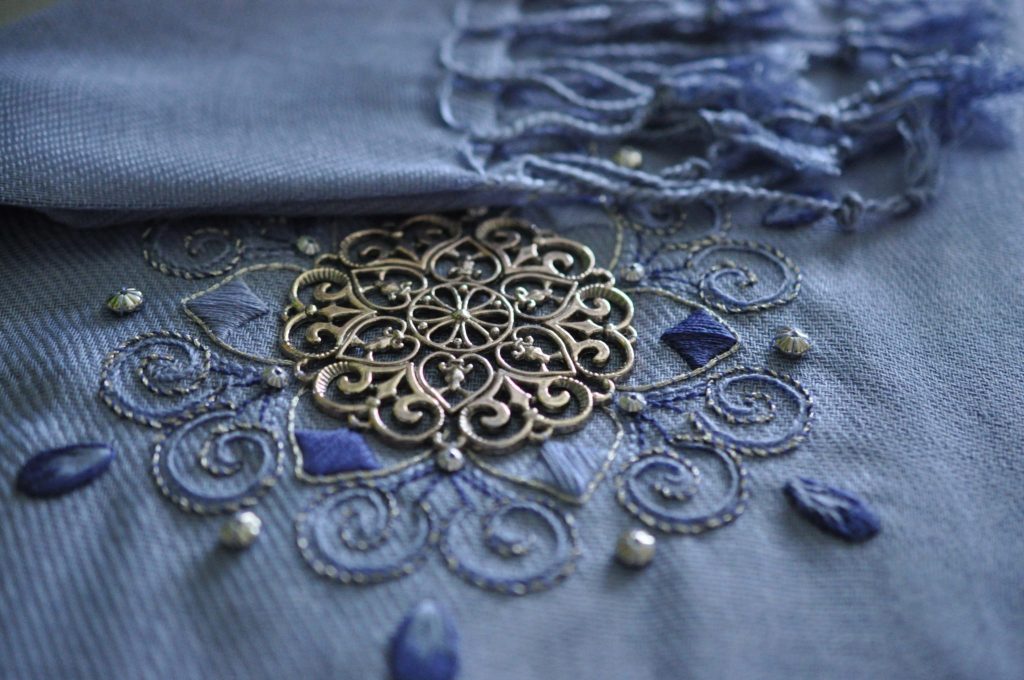
‘Filigree Medallion’ Introduction To Embroidery Class
I find it incredibly rewarding to have a class of students, some of which have never picked up a needle before, and to prove to them that they can also achieve beautiful results in stitch. I usually teach a range of about eight stitches in a day and it is lovely to see the students leave the classroom proud of their work and with the basic knowledge and confidence to have a go at more embroidery at home.
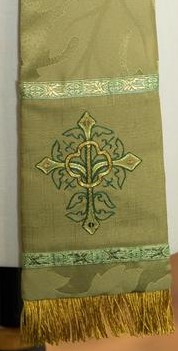
Explain your commission for a new set of vestment for St Andrew Compton Dundon?
Why it was commissioned
Members of the congregation and the church committee felt it was time to replace their old and quite worn set of green vestments. It was felt that a new and fresh set of green vestments would brighten up the church, especially with a design created specifically for them. The scrolling leaves and shades of bright green, yellow and brown reflected the beautiful rolling hills of the Somerset countryside surrounding the church. Yew leaves and birds make an appearance on the altar cloth to represent the ancient yew tree which sits in the graveyard. I chose to use a combination of wool, cotton and metal threads and utilised a number of techniques including applique, silk shading and goldwork.
The vestments were commissioned partly by the church and partly by Helen Thomas in memory of her late mother. I was already known by certain members of the church as I had assisted them with the creation of a red stole the previous year.
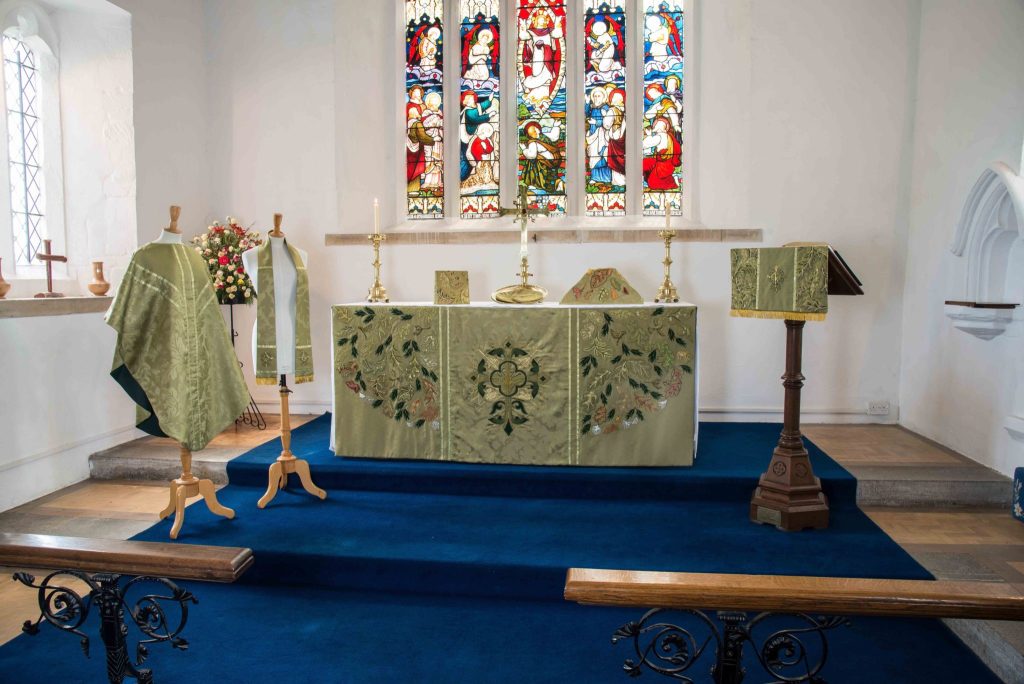
Compton Dundon Vestments
Time involved
The commission took about 18 months in total, from the start of the designing process through to the completion of the eight items.
Number of pieces commissioned
The set of vestments included a new altar cloth, burse, veil, lecturn fall, stole, chasuble and two collection bags.
stole
Discuss the collaboration need for this commission.
As this was a very large project it was decided to create the altar cloth, veil and collection bags as a collaborative project. I met with members of the local community on a regular basis to work on these items together. I chose to use a green fabric with a scrolling leaf pattern for the entire set of vestments and this enabled the ‘sewing ladies’ to cut out a number of leaves each and to decorate them with stitches and colours I had chosen for them and taught them during our meetings. The leaves were then collected and sewn to the side panels of the altar cloth once I had finished the large embroidery on the central panel. Extra leaves were created to decorate the veil and collection bags.
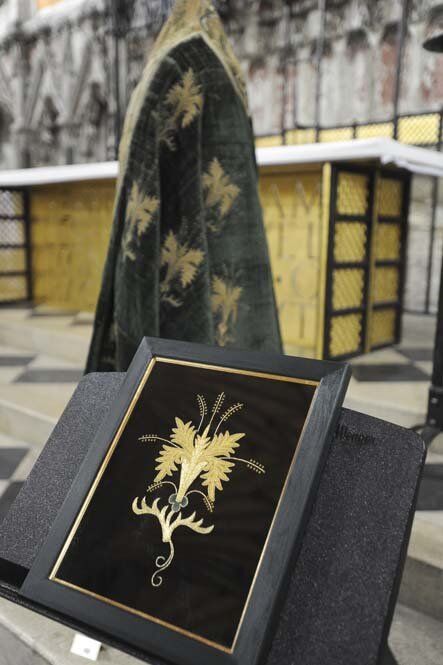
Discuss the connection with the 14th Century and your current work with the Ely Cathedral?
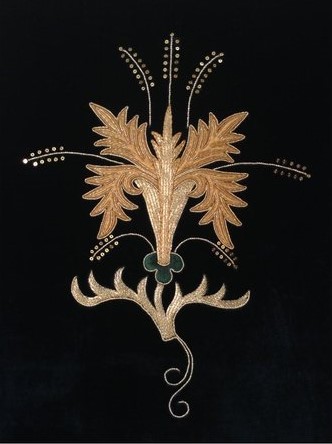
‘Ely Knot’
Ely Cathedral has a beautiful example of a cope which they have dated back to the 14th century. It displays 30 of the ‘Ely Knot’ motifs stitched in silk and goldwork onto a background of green velvet. The cathedral recently had a collaborative exhibition with the Royal School of Needlework on ecclesiastical embroidery and as part of it, wanted to have the cope on display. I was commissioned by the cathedral to recreate one of the ‘Ely Knots’ as a full size piece of embroidery to showcase how bright and impressive it would have looked when newly stitched. It was a fascinating project; I was privileged to be able have a close look at the cope and took notes and photographs in order to begin the process of researching the likely techniques and threads used to create it. I found a beautiful bottle green velvet to use as the backing fabric and sourced fine gilt metal threads along with silk floss to create the replica. This was framed and on display alongside the cope in the exhibition.
Still on a ‘Grand’ scale but not ecclesiastical, expand on the 2011 Royal Mail Year book?
Royal Mail
I was commissioned by the Royal Mail to create a piece of goldwork embroidery which was to be photographed and used as a title page in their special edition year book.

My embroidery introduces the chapter of stamps based on the crown jewels and the goldwork really sets the scene of opulence and glistening jewels. The design was created by an illustrator using a quote from Samuel Pepys and it was my job then work out how to recreate it as a stitched piece. I used a range of gilt metal threads and stranded cotton threads on a red velvet background.
Can you explain the need for archival preparation and care of your work?
It is of extreme importance to keep all embroidery work clean and secure both during and after the creation process to ensure that it will survive for many years to come. When I work on a commission I keep all of my notes, sketches and photographs as a hard copy and file them with order numbers. I also keep electronic copies as a backup. It is always useful to refer back to projects to remind myself how I created them, the design process and how I overcame certain problems. This system allows me at any given time to trace back all work connected with that particular piece should it be required in the future.
On pieces of embroidery which I create to be sold as artwork and in galleries, I add my stitched signature to the front of the design and will often write details on the back of the mount board when I am stretching the piece around the board ready for framing. Therefore if my work was ever to be restored by someone else in the future they would be able to see who created it, when, the threads and techniques used and how long it took.
Discuss the techniques involved in Silk Shading Orchid Branch.
Colours used:
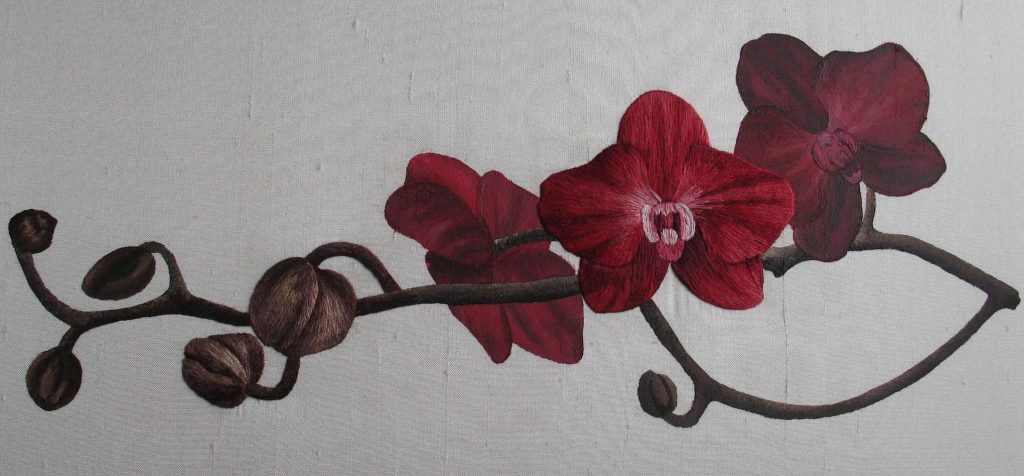
‘silk shading orchid’
I began the process of creating this silk shading embroidery piece by finding several photographs of orchid plants and combined them to create my own composition to work from. I used one clear photograph in particular to help me to select my colours of threads. In total I used fourteen different DMC and Anchor stranded cotton thread colours in a range of pinks, reds and browns.
Combination of techniques – Stitch and paint
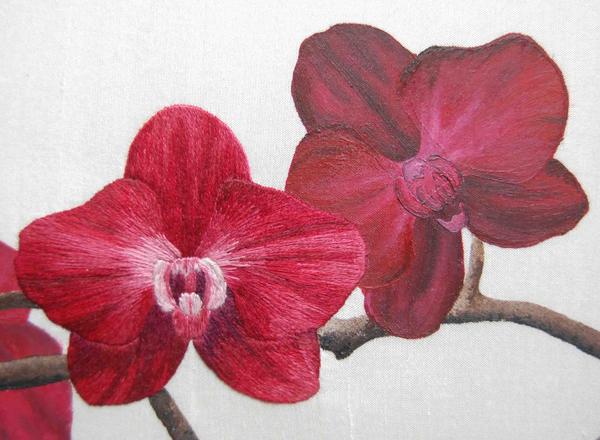
I decided to experiment with the idea of combining painting with embroidery.
I selected the largest flower in the foreground, along with the two larger buds and a section of the stem to work in silk shading and the rest I created with paint. I knew that the painted areas would appear flatter than the embroidered areas so would add a little more dimension to the design and the beautiful technique of silk shading would really highlight and bring forward those key areas.
I started by transferring the design onto silk dupion and then using opaque fabric paint, I built up the areas of the design, starting in the background and working each element in turn towards the foreground. I really enjoyed the challenge of painting straight onto the fabric and I think that the combination of painting and stitching has worked well.
How did The Bluebird Embroidery Company come about?
After I graduated from the Royal School Of Needlework I knew that I wanted to have a career in embroidery. I quickly became a freelance tutor, teaching day classes and workshops for groups such as the Embroiderers Guild and the West Country Embroiderers. I took on freelance work and started working on commission pieces and at the same time I returned to the Royal School of Needlework as a day class and weekend course tutor. Now I split my time between teaching select classes nationally and around the world, completing commission work, designing and selling embroidery kits and creating art work to display and sell in local galleries and on my website.
Discuss the use of kits and books in the company?
I create embroidery kits for sale on my website and are available for worldwide distribution; these are designed with full step by step instructions, progress photographs and all of the fabrics and threads needed to complete a project. The idea is to allow people to create their own beautiful designs without having to go to classes.
However, these kits began life as a teaching aid; I always produce a kit for each student in my class so that they can act as an invaluable reminder on how to create the stitches and finish the design after the student has left the class.
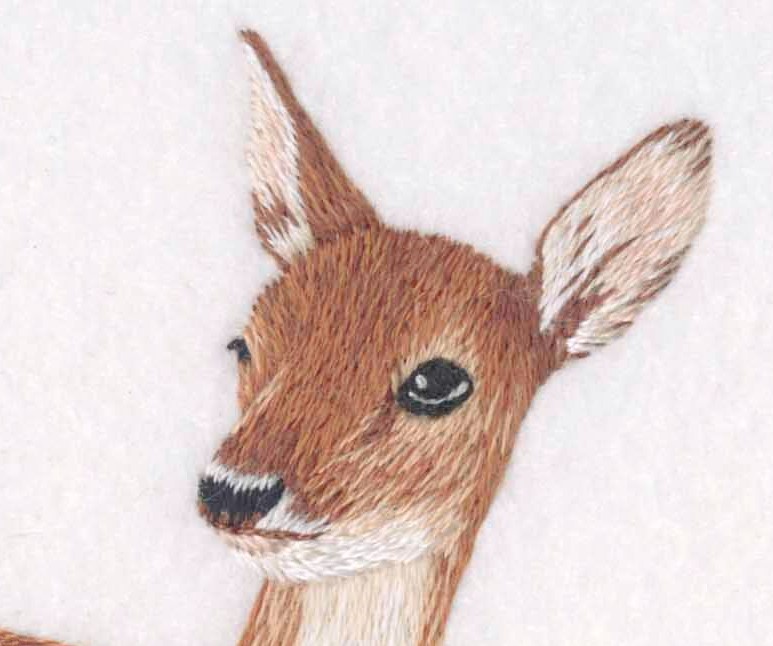
Discuss Fallow Deer – Original Hand Embroidery
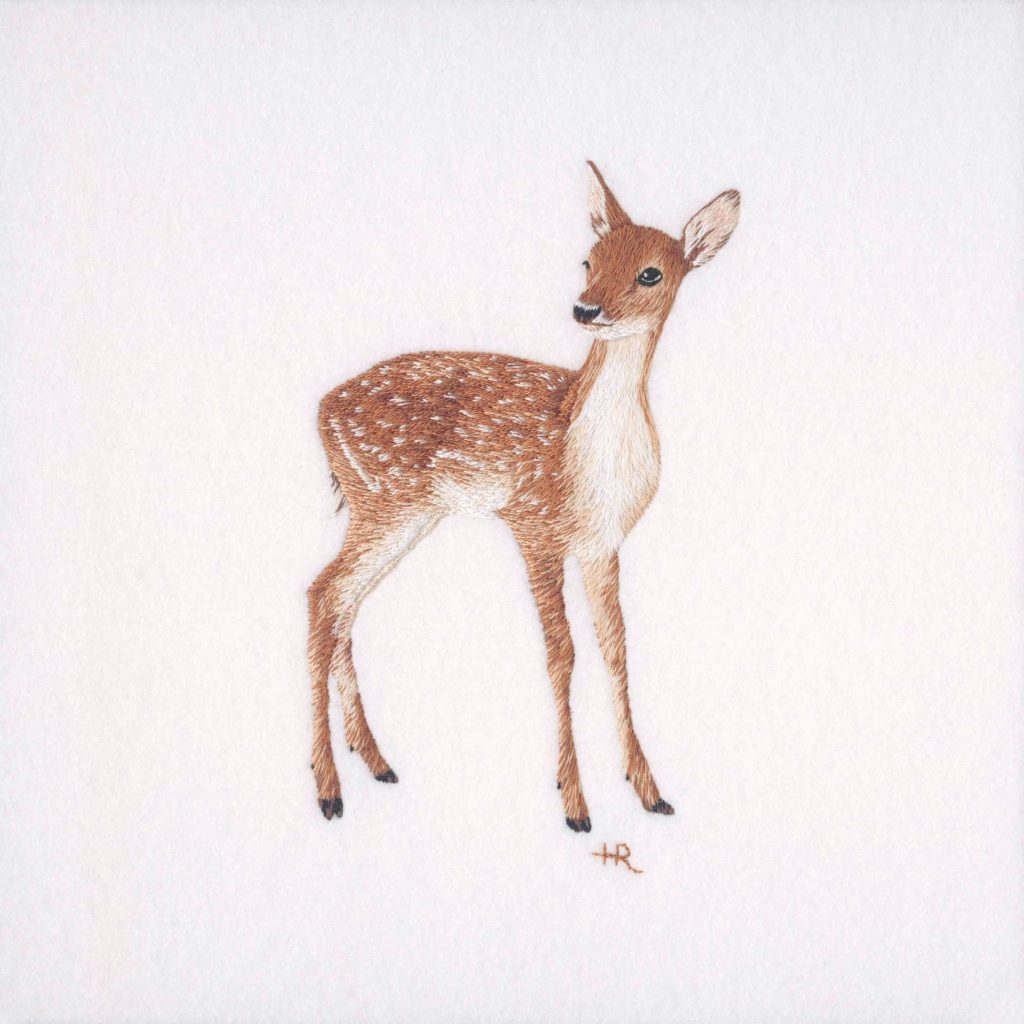
Fallow Deer
Time
The fallow deer took 30 hours in total. I spent about 3-4 hours researching reference images and designing the composition, one hour framing up into a slate frame, twenty three hours stitching the piece and two hours mounting the work ready for framing.
Techniques
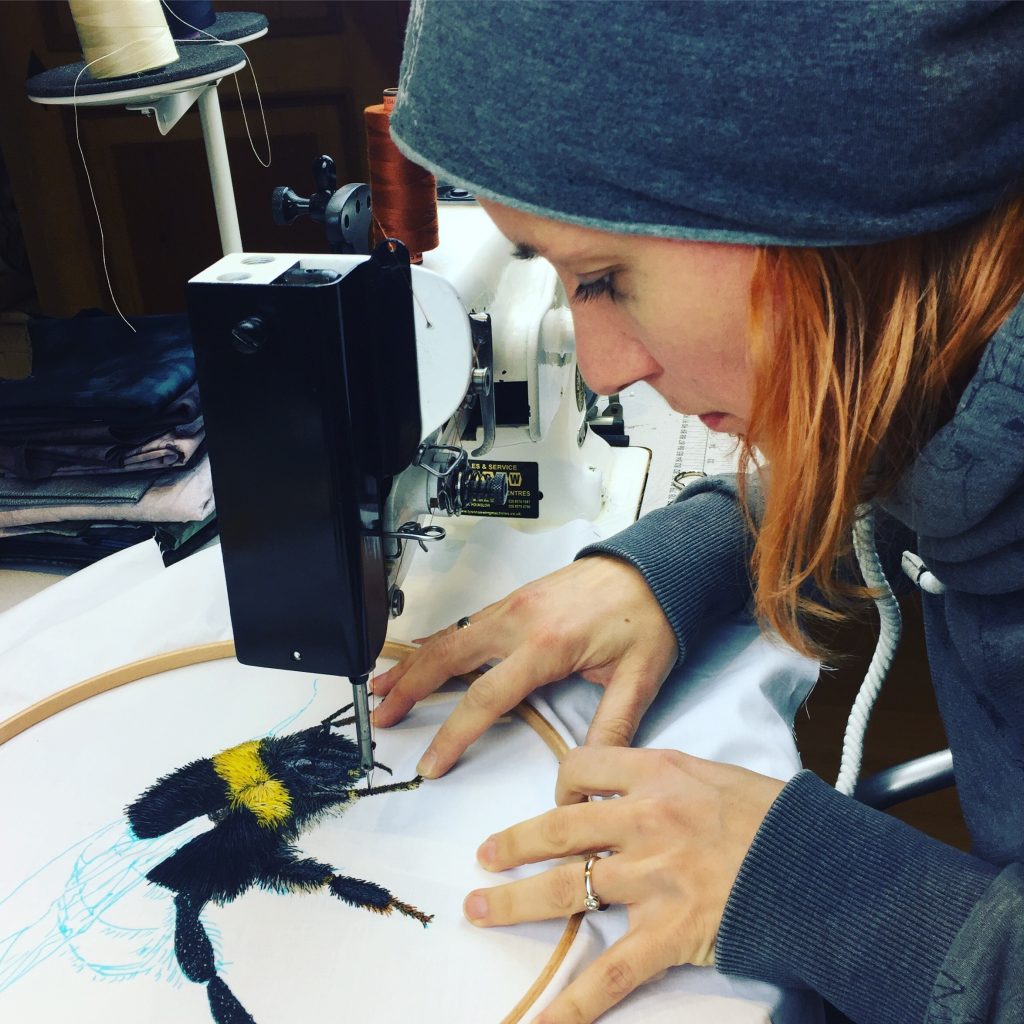
The fallow deer is from my ‘British Wildlife’ collection of pieces which were all created using the silk shading embroidery technique. I allowed my love for wildlife to inspire my work and to set the theme for this collection. I used a calico and ivory cotton felt backing and created the embroidery using a range of DMC stranded cotton threads. I started this piece by finding suitable photographs of Fallow Deer; I studied their movement as well as the texture, direction and colour of their hair. I created my own composition and began by creating shaded and colour drawings to familiarise myself with the form and the shading of the deer. I then tacked a basic outline onto the backing fabric before working the silk shading, building up the texture and colour as I went along. I used a total of twelve colours in this piece, a single thread of each inserted into a small size 12 embroidery needle.
Mounting
Once I had finished the embroidery I removed it from the slate frame, mounted it tightly around thick acid-free mount board and stitched a backing fabric to the board. I always mount embroidery pieces in this way in order to prepare them for framing. Having the embroidery stretched around board keeps the fabric smooth and flat and prevents any damage to the piece.
Limited editions
All eight pieces from my ‘British Wildlife’ collection are also available to buy from my website as high quality giglee prints and greetings cards. I do not have limited editions of this collection but it is something I am looking forward to offering for future pieces of work.
Discuss the Role of the RSN in the promotion of embroidery.
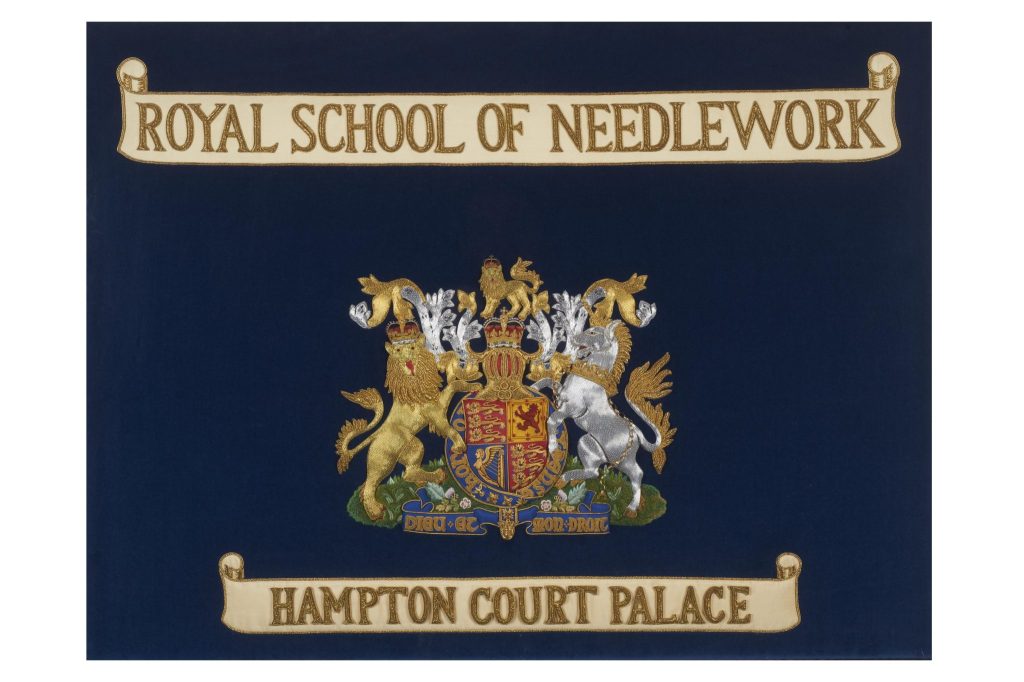
History
The school was founded in 1872 but was then known as The School Of Art Needlework. In 1875 it received its royal prefix when Queen Victoria became its first patron and the word “Art” was dropped from the title in 1922. The aim of the school was to ensure the future of the beautiful art of embroidery while providing employment for educated women.
Apprentices
The school no longer employs apprentices; in fact I was in the last year that they were accepted. However, the school now runs several methods of study including certificate and diploma courses, a BA (Hons) degree, short courses and a future tutor programme.
Commissions
The studio at the school has worked on many large and exciting commissions throughout its history.
Two key examples include: creating the goldwork embroidery on the Robe of State for Her Majesty The Queen Elizabeth II in 1953
and appliquéing the floral lace motifs for the wedding dress of The Duchess of Cambridge in 2011.
Royal patronage
At the start of 2017 the Royal Patron of the school changed from Queen Elizabeth II to the Duchess of Cornwall.
Contact details:
Helen Richman
www.bluebirdembroidery.co.uk
Helen Richman, Somerset, UK
Interview by Deborah Blakeley, March, 2017
Think a colleague or friend could benefit from this interview?
Knowledge is one of the biggest assets in any business. So why not forward this on to your friends and colleagues so they too can start taking advantage of the insightful information the artist has given?
Other artists you may be interested in: